
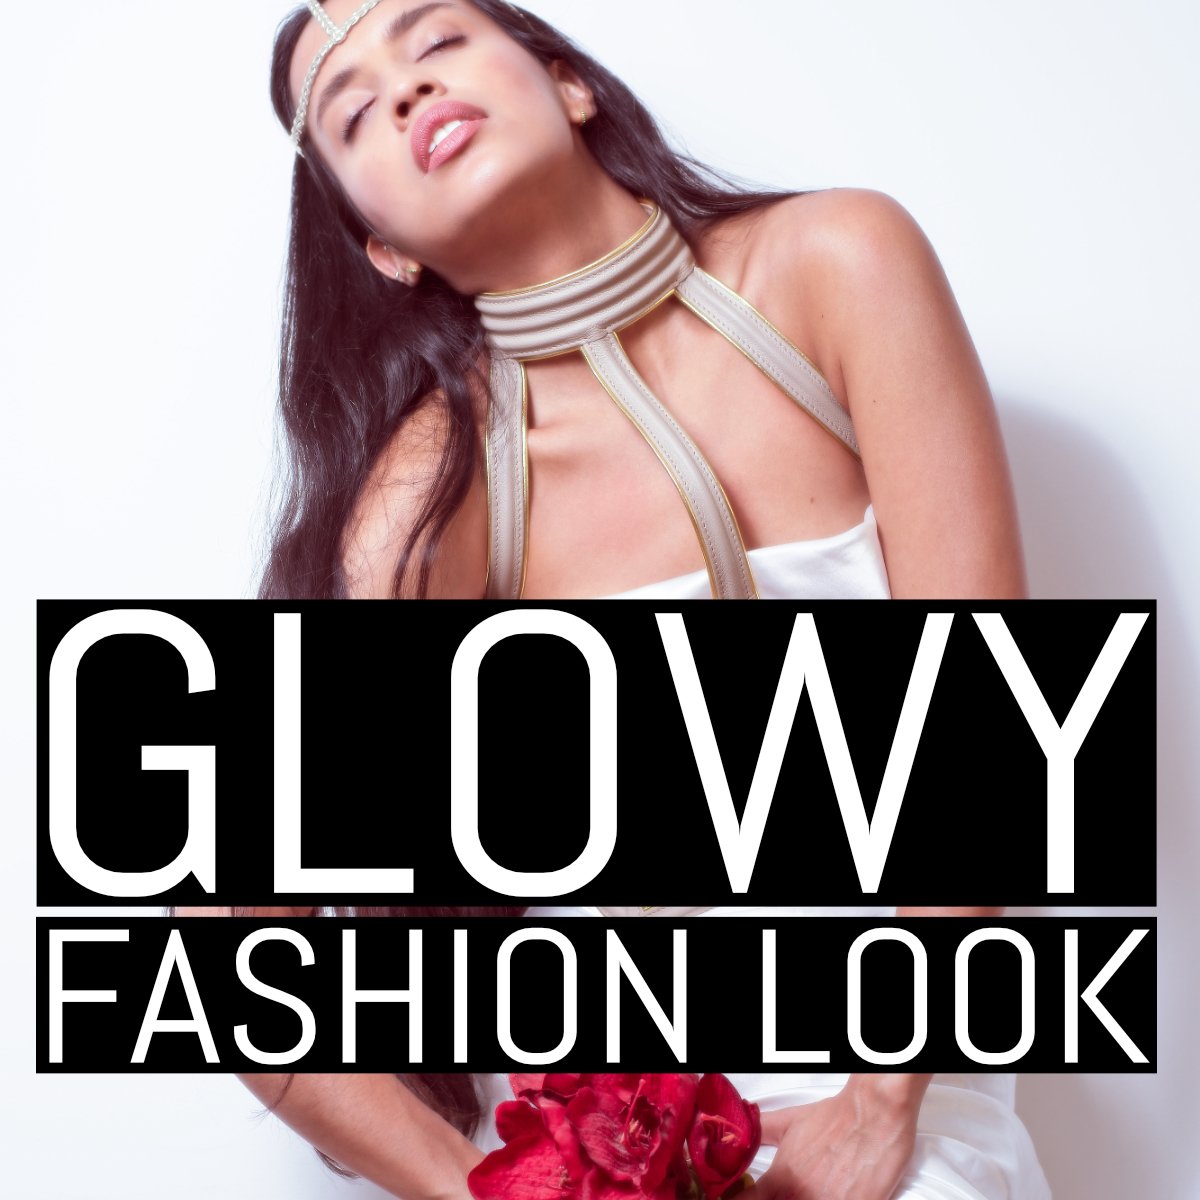
Glowy Fashion Look
The Visual Concept

A soft-focus, glowy look can lend fashion photographs an ephemeral allure. Here are five ways to to achieve this aesthetic.
Option 1 – Vintage Lenses
By using an old, soft lens wide open, a glowy look can be achieved.
This option is perfectly suitable if you want an in-camera look, but it has the disadvantage that you cannot change back to a normal, sharp look in post production.
Option 2 – Tilt-Shift Lens
A tilt-shift lens is a unique lens that allows the plane of acceptable focus to be tilted.
Tilt-shift lenses offer excellent control and at the same time ensure that eyes or other important parts of the image are actually sharp, something that cannot be done with very soft vintage lenses.
The downside is that a professional-grade tilt-shift lens is very expensive and requires practice to use correctly.
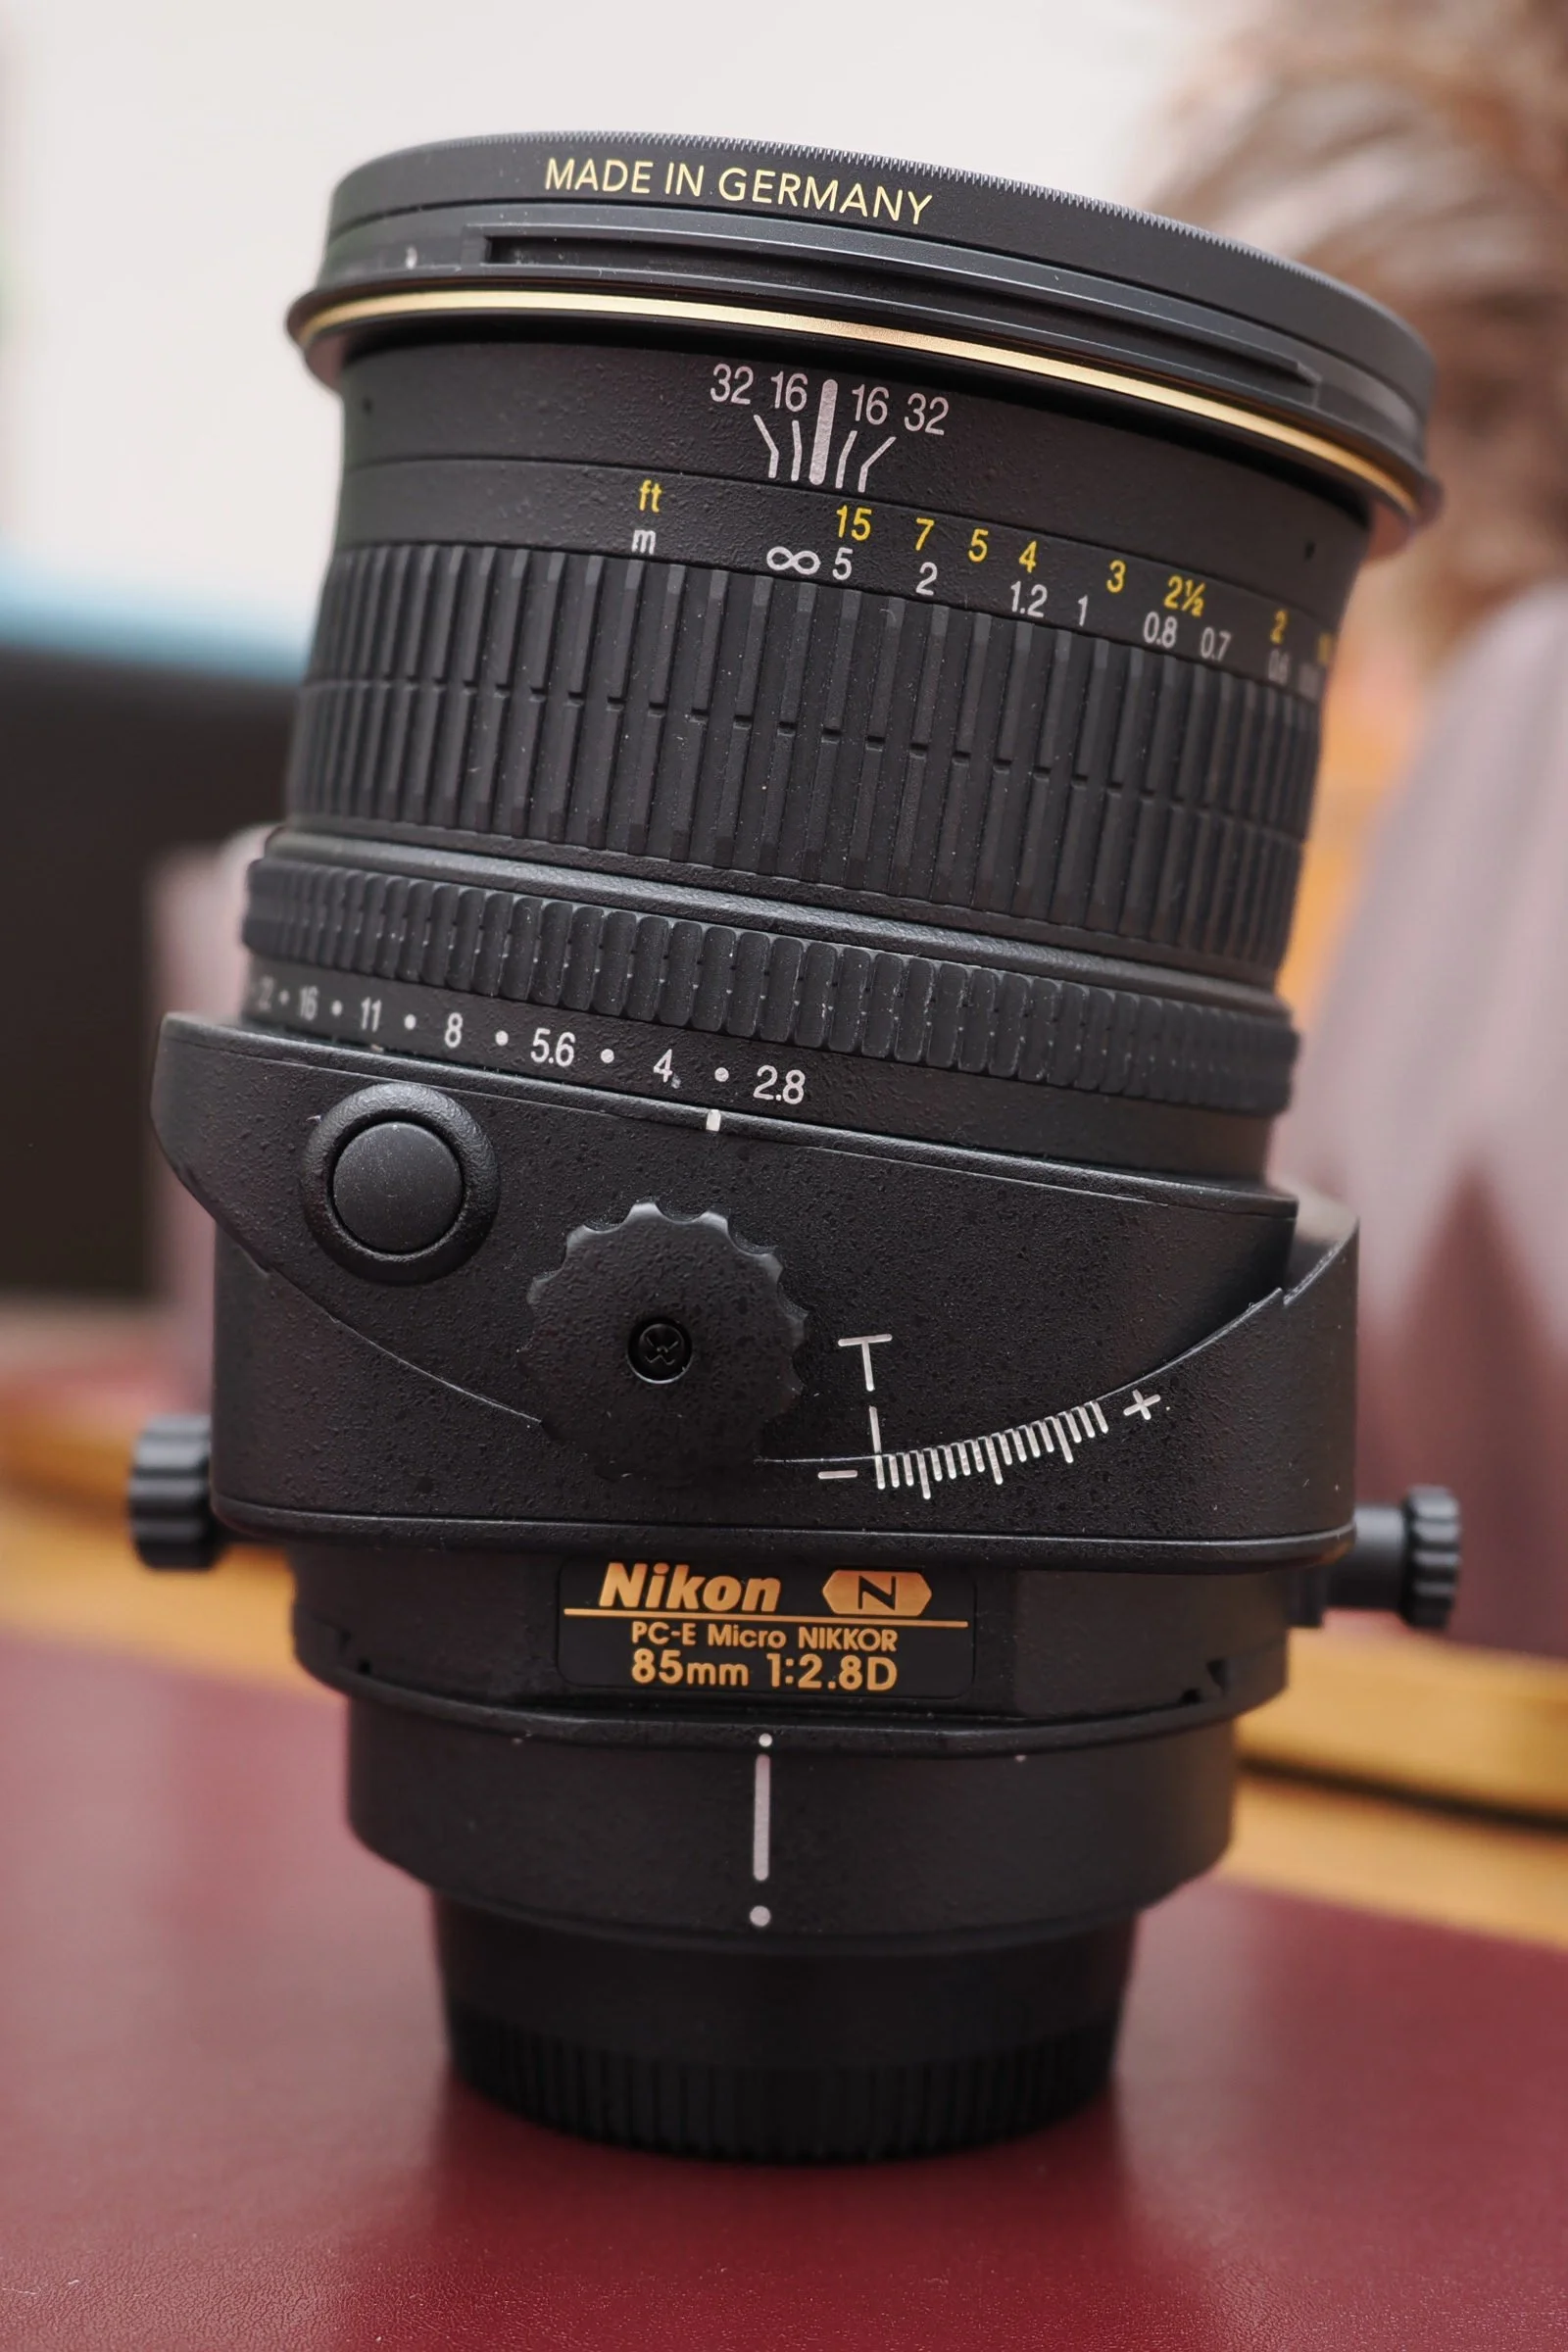
PC-E Micro Nikkor 85mm f/2.8D

Used correctly, the PC-E gives a very subtle, controllable glow-effect.
Option 3 – Lens Whacking
Holding a regular lens in front of the camera’s bayonet results in dreamy images.
I am not a huge fan of this technique, as it is very inconsistent and can therefore be very unnerving for the model and the photographer on set. Be that as it may, it is essentially cost free as it can be done with any lens.

The aperture and exposure has to be set manually as the camera is not connected to the lens.
Option 4 – Using a Soft-Focus Lens
Dedicated soft focus lenses were made for most professional camera systems of the past.
Depending on the system, such a lens can be very expensive and almost certainly hard to find as they were only made in small batches.
Also, their use is pretty limited as they cannot achieve a regular “sharp” look.
The Nikon 105 f/2 DC and the Nikon 135 f/2 DC are not soft focus lenses per se, but can produce such an effect with their Depth of Defocus Control technology.
Option 5 – Digital Post Production
Creating the look in post production gives you the best of both world, as you can always go back and readjust the look.
My preferred method is to use the “Glow” filter effect in ON1 Photo RAW as it offers an abundance of adjustments including the amount of glow as well as halo size combined with various blending modes.
Also, the free smartphone image app Snapseed offers the filter “Glamour Glow” which is capable as well, although nowhere near ON1’s “Glow” filter.

ON1 Photo RAW - “Glow” Filter

Final result - a subtle glow.
Final Remarks
Every method has its own merits and a distinct look that can’t be replicated with a different method.
If you are shooting analog or certain camera types, some of the methods are not feasible. Digital post production always works (given that you scan your film), but also the least “exciting”.
Have fun experimenting, it does not always have to be “tack sharp”.

Minimalist High-Key Concept for Fashion and Nude Shoots
The Idea
A minimalist setting with a model in a “white cube” shifts all the focus on their emotions and poses.
The visual concept I’ll outline in this article should lend the images a floaty allure and amalgamate this with a classic 80ies/90ies magazine color palette.
Camera and Film
In order to get authentic colour reproduction similar to vintage print magazines, I picked Fujifilm Provia 100F slide film. Slide film was number one for professional photographers before the advent of digital, so this means recreating the look with the correct medium.
As the type of camera significantly impacts the work on set and therefore also the results, the Hasselblad 500 C/M with the Zeiss Planar 10mm f/3.5 or similar medium format cameras are great for such a shoot. They make the workflow slower and more focused while the 120 format provides excellent fidelity.

The Hasselblad 500 C/M - a great studio camera.
The use of slide film requires precise exposure metering so pre-planning the lighting setup is important.
Lighting Setup
The subject is placed 2 to 3m in front of a white paper background, that extends almost up to the camera.
As a key light, a big Octabox is placed on the right of the subject accompanied by a smaller Octabox on the left.
The lighting ratio for this look is 2:1. This means that the key light is one EV brighter than the fill light, providing twice as much illumination.
In order to get an even, white background, two strip lights with a grid are set up to mitigate stray light. The light output of these background lights combined is set to match the output of the main light plus 1/3 of stop.

The lighting diagram.
Image Review
The lighting is even but with enough contrast to create some tension.
The head shot makes the 2:1 contrast ratio more obvious. There is a one stop difference in lighting on her face compared to her back.
The vignette on the background provides more focus on the subject and was created by placing the background lights correctly.
Thanks to the size and placement of the main Octabox on Katerina’s right side, her hands holding the jacket in front of her face don’t create harsh shadows.
Closing Remarks
The key element of this setup is the 2:1 lighting ratio. For 99% of all applications, I would not go below this “magic ration”, as images can start to look boring and uninspired.
You can also use a dark background without any additional lights but keep the 2:1 ratio for creating a completely different look.

Speedy JPEG Workflow
Shooting high volume with high megapixel cameras leads to incredible amounts of data in one folder. While newer cameras have the option of shooting lower resolution RAW-files (e.g. Nikon D850, Leica M11), older but still very capable cameras like the Pentax K1 or Nikon D800 can only shoot RAW at full resolution.
A normal workflow transitions from JPEG to RAW as late as possible in order to work with the lossless RAW format for as long as possible.
A way to speed up the workflow is to choose the transition point from RAW to JPEG earlier than usual, making it possible to work considerably smaller files.
A regular RAW-file from the D800 with 36 MP resolution has around 70 MB (14-bit uncompressed) and can take quite some time to load, while a 10 MP JPEG (uncompressed, AdobeRGB) has only 3.8 MB. 10 MP resolution is usually enough when photographing fashion shows or similar high volume events.
But how early can you transition from RAW to JPEG without noticeably losing quality?
The Workflow
I tested the following workflow extensively with very positive results:
1) In the RAW-editor (ON1 PhotoRaw in my case) of choice, export JPEGs with a neutral picture profile in Adobe RGB color space from the captured RAW-files to a separate folder. During this step, the resolution of the images is also reduced to a size appropriate for the project.
2) With the resulting flat JPEGs, everything from color grading, levelling, selective corrections and so on is done in the RAW converter (meaning this is non-destructive to the JPEGs).
3) For delivery and client preview, delivery JPEGs are exported based on the graded and adjusted flat JPEGs.
Image Quality Differences?
But is there a discernible difference in image quality or color compared to a RAW to JPEG workflow?
Neutral, downsized JPEG (from the RAW-file)
Graded JPEG (from the neutral JPEG)
Direct-from-RAW JPEG
Detail View
No visible differences
In addition to the visual examination (which did not reveal any differences), I also compared the file sizes of the exported images. The RAW-to-JPEG (4.1 MP, sRGB) file is 313 KB and the RAW-JPEG-JPEG file is 310 KB - they are essentially identical.
Conclusion
If you want to speed up your professional workflow significantly (especially when running an older computer system and a high MP camera body), this is might be a solution to your problem.
Additional remark: Set the exposure before exporting to the flat JPEG, as the JPEG offers almost no latitude and every correction of exposure will result in color shifts.